Baby Backpacking: 6 Months Old

Baby Backpacking: 6 Months Old

Baby’s first backpacking trip!! In this post I’ll talk about my first overnight backpacking adventure with my 6 month old baby (I’ll refer to her as “Acorn” for the purposes of this blog) and her daddy (his first backpacking trip in 15 years!). I also include a baby-specific gear list at the end of the post.

Baby backpacking with a six month old that is very happy in her Mini Mo sleeping bag

Introduction

If Acorn had been a spring or summer baby, I’m sure we would have taken her out backpacking sooner but instead she was born on a late fall evening and we’ve navigated through the cold New England winter and early spring with lots of walks and the occasional hike.

Although I would have loved to take her out backpacking sooner, there were two things holding me back. First, I couldn’t imagine taking her out for an overnight with below freezing temperatures yet (i.e., I wanted to make sure that there would be absolutely zero risk of frostbite). Second, almost all of the baby backpacking gear I found was for ages six months and up. For example, her baby sleeping bag, a Morrison Mini Mo 20 degree bag ( 9 oz; ages 6 months to 24 months) that I bought her for Christmas, and her KidCo Peapod Plus (ages 6 months to 5 years) that we got as a hand-me down and that we use to create a safe baby sleep environment in my tent (it is essentially a tent within a tent).

The setup for our baby backpacking trip showing the mommy and baby sleep areas within my old Copper Spur UL3 tent showing the KidCo PeaPod Plus

As Acorn’s half-birthday approached I started stalking the weather forecast in much the same way that I stalked the weather when planning my solo winter ascents of Mt. Washington. For Acorn’s first backpacking trip I was looking for a day without any rain in the forecast and with overnight lows of at least 40… not an easy feat in April in New England. As luck would have it, the only day within the 10 day forecast that met my criteria was the exact day that Acorn turned 6 months old. I couldn’t think of a better way to celebrate than with our first family backpacking trip! :)

Forecast Day 1: Cloudy with a high of 55 and a low of 41

Forecast Day 2: Sunny with a high of 65

In addition to weather, the other big consideration for this inaugural backpacking trip was the destination. I was looking for something nearby, no more than a couple of miles of hiking along easy terrain in case we needed to bail out and head home in the middle of the night, and somewhere without many other people in case Acorn didn’t like the experience and decided to scream the whole time we packed up and hiked out. After much consideration and a phone call with the local land manager we decided on an option that was a short drive from where we were staying and had an easy hike of about a mile each way to where we were going to camp and then another short hike to an overlook with some of the best views around. The area is beautifully remote, uncrowded, and the locals prefer to keep it that way so I won’t be disclosing the location in this post.

Baby Backpacking: Day 1

Despite all my careful packing and planning, a couple of hours before we were scheduled to set off on our adventure the weather forecast become more ominous with the predicted clouds suddenly predicted to produce rain during the exact window of time when we were going to be hiking and setting up camp… definitely not ideal! Although my spirits were slightly dampened, we adopted a wait and see attitude. Especially since the forecast seemed to be changing in accordance to the old adage, “if you don’t like the weather, wait a minute, it’ll change”.

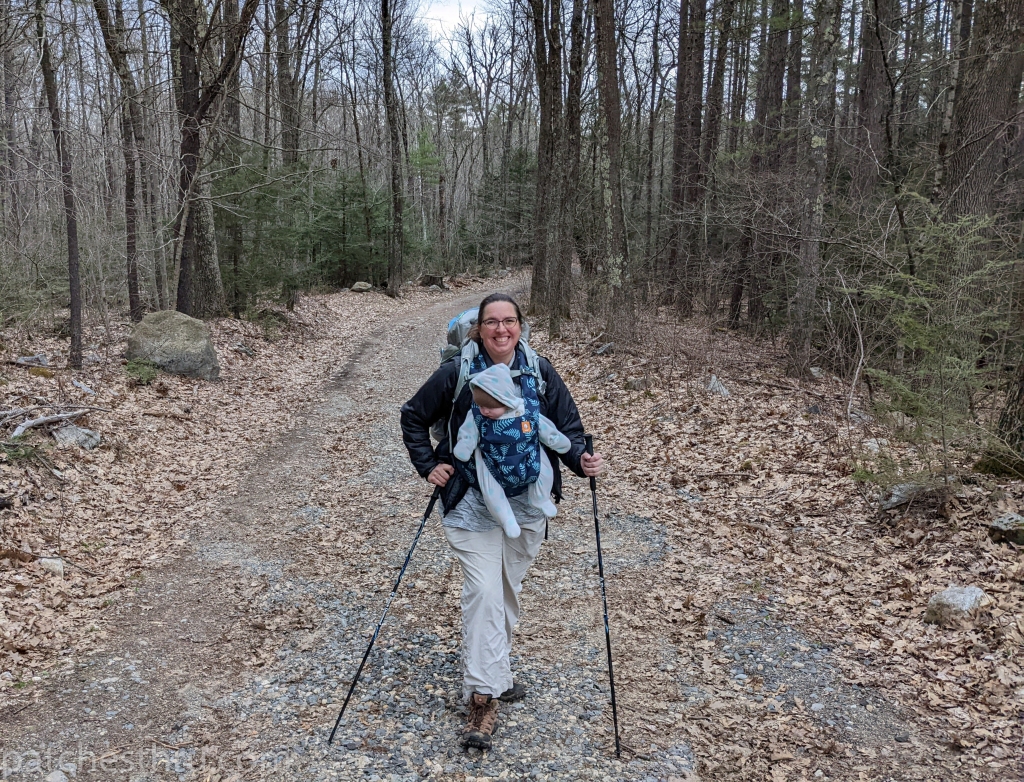
In the meantime I loaded Acorn into the carrier, put on my raincoat, and flipped my full pack onto my back. I was concerned that the overlap of the backpacking straps and the carrier might be uncomfortable, but was pleasantly surprised that they didn’t seem to interfere with each other. I was so excited about carrying my pack and my baby at the same time that I decided to take a quick stroll up the driveway to see how it felt in motion… good, all good. The only awkward bit was getting the hip belt of my pack strapped, but it ended up fitting best under the baby but over the wide part of the carrier waist band.

As the time to load the car and leave approached the sky was looking rather gray and dreary, but the forecast rain was no where to be seen and the radar made it look like the storm was going to miss us so we decided we’d give it a go. One of the advantages of the short drive and short hike was that if the weather turned we could change our mind at any moment and head back home without too much trouble.

The drive to the trailhead was dry and as we donned the baby and the backpacks the skies remained dry and we thought that maybe, just maybe, the rain would completely miss us. Of course we were wrong. Barely ten steps into the hike and I began to hear the telltale pitter patter or rain filtering through the trees and a few minutes later the cool drizzle filtered down to us.

“If it starts to pour we turn around, right?” I said/asked my partner.

“Right,” he agreed.

“I’m ok continuing with it like this though… Are you?” I continued, wanting to make sure I wasn’t dragging him into a situation he was uncomfortable with.

“Yeah, this isn’t too bad,” he replied unphased.

Despite the short-lived shower, it felt great to be out on the trail again. I’d missed backpacking, and even with the added weight of the baby and the extra body weight my postpartum body still carried, I still felt at home with the pack on my back.

At the first stream crossing we spotted a beaver in the swamp beside the trail, less than ten feet away from us. It’s probably the closest I’ve ever been to a beaver. We stopped and watched it swim alongside the trail. It gave us a glance, glided across the water, and then slick as anything it dove under the surface and disappeared. It seemed an auspicious start to our trip.

Close up of mom and baby smiling on the trail

As we hiked out and set up camp we were sprinkled on with a bit if rain here and there, but nothing constant and nothing too heavy. Just enough to make us question our sanity, but by the time we got to our campsite it was easy to imagine it might start clearing soon. 

In fact, by the time we finished setting up camp golden hour sun was breaking through the clouds and intermittently tickling the tops of nearby trees.

With hope of catching a glimpse of that sun, and the sunset, we decided to hike to the top of the nearby Vista to catch a view before bed. We knew setting off that our return hike would be a night hike, but we were prepared for that and it’s a hike that we’ve done after dark before.

The family, mom, dad, and baby, at the overlook

Unfortunately the bright warm sun that had lured us from our campsite quickly gave way to darkening clouds and gusty winds. The views from the overlook were still stunning, but it was too cold and exposed to stop, nurse the baby, and change her diaper from the view spot as we’d originally intended.

A panoramic view from the overlook showing mom, baby, and the body of water in the background

As a result, the return to the campsite was epic and constituted Acorn’s first night hike. She was a bit fussy, so I stopped and did a middle of the trail diaper change, then a few minutes later Daddy did a mid-trail bottle feeding.

Eventually we made it back to our tents and settled in for the night. I nursed the baby, then gave her a bottle, and we snuggled her while we settled into some snacks of our own before finalizing our sleep arrangements for the night.

Believe it or not, we’d actually carried 4 tents with us on our little backpacking trip if you count the baby’s tent: the Peapod Plus (3.5 lbs), the Ultamid UL4 (1.4 lbs), the Copper Spur UL3 (~ 4 lbs), and my Fly Creek Platinum UL2 (1.7 lbs). Acorn would sleep in the Peapod Plus with mom in either the Ultamid or the Copper Spur and dad would sleep in either the Copper Spur or the Fly Creek UL2. Even as we set off for our hike to the overlook I was thinking that I’d sleep in the Ultamid with Acorn, but at the last minute I opted for sleeping in the Copper Spur UL3 since I wanted Acorn to have complete bug protection and didn’t want to have to zip and unzip her Peapod every time I wanted to check up on her in the night. That left Daddy in the Fly Creek UL2.

As we settled into our respective tents for the night Acorn smiled up at me from her sleeping bag, grinning ear to ear and showing no signs of sleep as I went through our nighttime bedtime routine. Then I smelled the tell tale scent of poop… Really? COULD I really smell poop through the diaper, through the fleece pajamas, and through the 800 fill down 20 degree sleeping bag? Yes, yes I could!

I was pretty happy with my diaper changing setup and can tell you happily that no poop got onto the down bag during the changing of the baby. Phew!

I lay down in my sleeping bag in my tent, next to my daughter in hers and we looked at each other and smiled. What a wonderful feeling. I reached over set my hand reassuringly on her chest and she slowly drifted off to sleep, rubbing her eyes occasionally.

After she fell asleep I lay there in the dark, serenaded by the peepers, the wood frogs, and an occasional owl and slowly drifted off to sleep too.

Overnight

Excerpt from my journal entry for the night:

I awake to the sounds of a muffled baby whimper. It’s pitch black. I open my eyes, see nothing, and reach into the baby tent to make sure Acorn is ok. I grab onto what I think is her arm and move on searching for her head. I find what I think is another arm, but still no head where it is supposed to be. At this point I have a second of panic that wakes me all the rest the way up. I grab her incredibly poofy torso and pull her into my lap. She rolls towards me, rooting, and I realize her head is just fine, she’d just rotated herself 270 degrees in the tent and is hungry. What I thought were arms were legs.

I take out her pacifier and she peacefully adjusts her head to latch onto my breast and begins nursing immediately. I was worried her face might be cold because mine is, but it seems she’s perfectly cozy. It’s cold enough that the peepers have stopped now, but the wood frogs songs continue into the night. I listen as I nurse and it is beautiful and everything is right with the world, backpacking with a baby at my breast.

Acorn is back to sleep in her tent. Hopefully I’ll follow suit soon!

In the Morning

Much to my surprise Acorn seemed just as happy sleeping in her backpacking tent as in her crib at home. She woke to nurse in the middle of the night and then again as all the birds began their morning cacophony of songs. I listened to the birds singing outside the tent while Acorn nursed sweetly. Acorn opened her eyes and lifted her head startled by the staccato tapping of a woodpecker in one of the trees overhead.

“That’s a Piliated woodpecker,” I explained as she looked up at me questioningly, “It’s ok” I reassured her, and she finished nursing and fell back to sleep. I put her back into her tent and fell back to sleep too.

Finally it was time to get up and get moving and I awoke to find Acorn smiling at me from her tent. I picked her up, nursed her, and then Daddy brought me a freshly warmed bottle to top her off.

After taking care of Acorn we got up, lounged about a bit and had a wonderful breakfast of Mountain House Raspberry Crumble and Earl Grey tea. Acorn was a bit hungrier than usual and nursed a bit as we packed everything up and got ready to go.

It was such a beautiful day that I was reluctant to leave the woods, so I savored every minute of it. Besides it was such a short hike back to the car we tacked on another short hike to check out my favorite trail for spotting mayflowers on the way home.

All in all, our first backpacking adventure was a success and we’re looking forward to our next one!

Baby-Specific Backpacking Gear List

Baby backpacking gear including Morrison Outdoors 20 degree sleeping bag, KidCo Peapod Plus Baby Sleep Tent, baby ground cloth, diaper bag, formula, ultralight baby book, change of baby cloths, and a Tula Baby carrier
The 7.5 lbs (3.4 kg) of baby-specific backpacking gear we carried for an overnight backpacking trip with a six month old in April in New England with forecast overnight lows of 40F (4C)

We ended up carrying 7.5 lbs of baby-specific gear, most of which was the 3.5 lbs KidCo Peapod Plus baby tent/safe baby sleep space. This was convenient as a completely contained bug-proof space to put the baby while we were pitching the other tents and setting up camp, and also a contained sleep space within the tent for our overnight adventure.

Baby Gear (7.5 lbs):

  • Safe Sleeping Space (3.5 lbs): KidCo Peapod Plus (ages: 6 months – 5 years)
    • Note: A popular lighter weight and less expensive alternative is the KiloFly Toddler (1.4 lbs)
  • Sleeping Bag (9 oz): Morrison Outdoors Little Mo 20C Down Sleeping Bag (ages: 6 months – 2 years)
    • Note: For warmer weather the Morrison Outdoors Little Mo 40C Synthetic Sleeping bag (15 oz) is an option
  • Baby Carrier (1.7 lbs): Tula Explore Baby Carrier (ages: 7lbs to 45lbs or newborn to toddlerhood)
    • Note: this carrier is cotton so definitely not ideal for wet weather
  • Baby Ground Cloth (2.9 oz): Small tyvek sheet with animal print on it
  • Baby Diaper Bag (16 oz): A gallon-sized ziploc containing
    • 5- fresh diapers (5 oz)
    • wipes (4 oz)
    • hand sanitizer (1.2 oz)
    • disposable changing pad (0.8 oz)
    • 2- pacifiers (0.5 oz)
    • 2 teething toys (2.6 oz)
    • Backup formula (0.7 oz)
    • Ziploc bag for dirty diapers (0.4 oz)
    • “Indestructable” Spanish-English Book for Bedtime Routine (0.7 oz)
  • Baby Clothes Bag (5 oz): A gallon-sized ziploc containing
    • Extra Fleece pajamas
    • Lightweight hat
    • Heavyweight hat
    • Burp Cloth

Since we were “dry camping” (camping without a water source) and I triple feed (supplementing breastfeeding with pumped breastmilk and formula) we carried two pre-mixed 4 oz. bottles full of formula with us as well.

In general I was happy with all of the baby gear we carried and for our next overnight am planning to carry pretty much the same set of gear. I was a little bit worried that the 20C down sleeping bag might be too warm for Acorn, but it ended up being just right… also down and baby seemed like a potentially bad combination, but it didn’t end up being a problem. If the overnight lows start creeping up towards the upper 50s we’ll switch to the synthetic 40C Mini Mo bag.

For longer trips backpacking trips I’m concerned that the cotton baby Tula might not be the best option since cotton and backpacking don’t traditionally make for the best combination. I’d definitely be interested to hear what other backpacking moms are using for a baby carrier along with their full pack. I’m also looking into baby raingear options in case we run into wetter weather.


Check out my posts about hiking and backpacking while I was pregnant with Acorn:

Hiking Killington Peak: 7 Months Pregnant

Hiking Killington Peak: 7 Months Pregnant

Climbing up the final steep, rocky ascent to Killington Peak while 29 weeks pregnant

Even though I’m seven months pregnant, it didn’t take much to talk me into climbing Killington Peak (one of Vermont’s 4000 footers). In fact, all my partner had to say was, “Hey Patches, do you want to climb a mountain?” My answer, of course, was “Yes! Which one?” The mountain he suggested was Killington (elev. 4242′) in Vermont.

The last time I’d climbed Killington was in 1998 on my thru-hike of the Long Trail (LT), so we did a quick check of the different trails to the summit. The Bucklin Trail, which approaches the peak from the West before joining up with the LT and the Appalachian Trail (AT) seemed like the best choice for our day hike. It would be an out-and-back hike of a little less than 8 miles round trip with an elevation gain of ~2400′.

Trip Report: Killington Peak Via Bucklin Trail

  • Date: August, 2021
  • Activity: Day Hiking – Out and Back
  • Difficulty Level: Moderate
  • Trail Name(s): Killington Peak (elev. 4242′) out and back via the Bucklin Trail and the AT (~7.8 miles total; ~3.9 miles each way)
    1. Bucklin Trail (3.4 miles) from the parking lot to the Appalachian Trail. The first two miles to Irene Falls is gently and easy. From there, the trail begins a steady moderate climb the rest of the way to the Appalachian Trail/Long Trail Junction.
    2. Long Trail/Appalachian Trail (0.1 miles) to Cooper’s Lodge and the Killington Spur. This stretch of trail is generally easy.
    3. Killington Spur (0.2 miles) to the Summit of Killington. The final push to the summit is rocky, steep, and strenuous, but it doesn’t last long.
    4. Trail J (0.2 miles) from the Summit down to Peak Lodge for a snack, water, and flush toilets! This trail is short and moderate and chock full of tourists when the gondola is running. On the plus side, you may be able to purchase food and beverages at the lodge.
  • Location: Wheelerville Rd, Mendon, VT
  • Access and Amenities: Parking area and trail kiosk. No restrooms or outhouses available. No fee.

As a pregnant hiker, I find that I am much slower while climbing mountains than usual, so we opted to do a three-day camping trip to Vermont with our climb of Killington bracketed in the middle so we could get an early start on our hiking day, and not have to worry about a long drive home after our climb.

Our glamping tent, set back into the woods in Vermont. I have to admit that I’ve really appreciated having a queen-sized cot in the glamping tent while pregnant. It is definitely easier than levering myself up and off the ground while backpacking.

Bucklin Trail (~3.4 miles; easy to moderate)

We arrived at the Bucklin Trailhead Parking a little bit before 10 am on Saturday morning and were pleasantly surprised to find the parking lot more than half empty.

As advertised, the first 2 miles of Bucklin Trail were fairly flat, wide, and easy, so they went by fast. However, the easy stuff came to an abrupt halt just after the “Irene’s Falls” sign 2.3 miles from the trailhead. From there, the trail veered away from the stream and started gaining elevation much more quickly, ascending nearly 2000′ in the next mile.

In this steeper section my pace slowed significantly. The extra weight of pregnancy definitely makes hiking harder. That and my uterus crowds both my diaphragm and my bladder so I get short of breath more easily AND I have to pee more often :-P However, we kept a slow and steady pace and eventually made it up the to junction of the Appalachian Trail/Long Trail.

Grinning ear-to-ear after finally merging onto the AT/LT section of the trail, reminiscing about my Long Trail thru-hike in ’98 and my AT thru-hike in ’13. It may be harder hiking while pregnant, but the trail still brings the same smile to my face that it always has.

LT/AT (~0.1 miles; easy)

Although we only followed the Appalachian Trail/Long Trail for a short distance, it was nice for me to visit the white blazes of my thru-hiking journeys.

The stretch of trail between the Bucklin Trail and Cooper’s Lodge (an AT shelter) was standard AT fare with plenty of rocks and roots, but didn’t gain much elevation.

Although we were eager to get to the summit and the views it offered, it was definitely time for a refueling break for me. So we stopped and ate some snacks/lunch lounging in the sun at the tent platforms behind Cooper’s Lodge (The spur trail to the summit of Killington is located behind the lodge, just passed the tent platforms.)

While we were there, we ran into some thru-hikers and I offered them some trail magic. I’d packed in half a dozen extra raspberry bear-claws and macaroons just in case we ran into hungry thru-hikers. During my 2013 AT thru-hike I was so hungry and so low on food that I hadn’t been able to climb the spur to the summit of Killington. Instead, a day hiker had offered me a snack and I’d headed straight to the Long Trail Inn and a long-awaited resupply… so it was extra special for me to be able to offer some of this year’s AT thru-hikers extra snacks. They each took a bear claw and a macaroon and headed to the summit.

The steep, rocky trail of the final ascent to the summit of Killington via the spur trail. It was definitely slow going.

Killington Spur (~0.2 miles; strenuous)

After resting and fueling, we were ready to tackle the final 0.2 miles of steep rocky trail to the summit. This section didn’t last long, but it definitely gave me a full body workout and was very slow going. It reminded me of a lot of the other trails to the summits of 4000 footers in New England. It still went by one step at a time, but each of those steps was much bigger. There were definitely places where I was using my hands/arms to help balance my body as I scrambled up and over the rocks of the trail.

Before long, the trail was steep enough and high enough that we could start to see spectacular views of the valley stretched out below us and we emerged onto some rocky outcroppings where we could stand, catch our breath, and take in the views. It was gorgeous.

However, we knew when we finally reached the summit because it was crowded with folks that had hiked the much shorter and more moderate 0.2 miles from the gondola to the summit. The summit was big enough for all of us, and it was such a spectacular view and a spectacular day that we didn’t mind sharing it. Also, it meant that we were able ask someone to take a photo of us at the summit.

Beyond the Summit (~0.2 miles)

After a short break at the summit, we decided to hike over to see if the Killington summit lodge was open. It was so nice out I was looking for an excuse to linger at the top of the mountain, and I was daydreaming about what kind of nice icy cold beverages might be available at the lodge.

The trail over to the gondola and lodge immediately dropped into the trees, but didn’t descend very far before opening up onto the grassy ski slopes. It was a little bit surreal after all our long hours of hiking to see the constant stream of people, mostly mountain bikers, emerging from the gondolas and spilling out onto the ski slopes. I’d heard that mountain biking on Killington was a thing, but hadn’t realized just how popular it was!

At the platform for the gondola they’d set out a sign that said “Ski Lodge Closed for Private Event”, however I wasn’t sure I believed the sign because I’d seen so many people hiking between with lodge and the summit with ice cold beverages. Since the lodge was just a couple of hundred feet further we decided to check it out anyway. Sure enough, the lodge was open. It turns out that the sign said open on one side and closed on the other side. They’d faced the open sign towards the gondola riders and hadn’t given any thought to the hikers that had come up the long way.

I was surprised at the number of different ice cold beers and microbrews were available at the Summit Lodge, but luckily there were a few nonalcoholic beverages available too… so I loaded up on cold drinks, ice cream, and chips and lingered a while longer near the summit before my partner nudged me and suggested that we should probably start heading back down. By that time it was already passed 3pm, and we was definitely right.

Bracing my ankles for the long downhill of the return hike

Heading Back Down

On the way day, we just reversed our steps. However, over the course of my pregnancy I’ve definitely noticed that my ankles have become more unstable, especially on the downhills. Having sprained my ankles more than enough times for one lifetime already, I pre-emptively wear BOTH of my heavy-duty lace up ankle braces when descending mountains while pregnant. I also carry both of my knee braces with me in cases my knees get cranky, but so far I haven’t had to use them.

In general, the descent was just long, slow, and careful. The steepest parts of the spur trail to the summit I essentially had to sit/slide down in parts because my center of gravity is a bit out of whack and I wanted to err on the side of not falling, but in general it wasn’t too bad.

We made it back to the car a little bit before 6pm, happy, tired, and hungry. Since it was getting late we decided to stop and get dinner at the McGrath’s Irish Pub at the Inn at Long Trail in Killington. I’d stopped there for dinner on my LT thru-hike (’98) and my AT thru-hike (’13), and it was the perfect way to finish our day hike in ’21.

A couple of happy hikers on the trail looking forward to new adventures..
Backpacking Bondcliff: 7 Months Pregnant

Backpacking Bondcliff: 7 Months Pregnant

A photo of a 7 months pregnant backpacker with a giant smile on her face getting ready to crawl into her tent after a long day of hiking. The backdrop shows a lush green forest

I decided to celebrate the beginning of my third trimester with a 3-day solo backpacking trip to one of my favorite 4000 footers in the White Mountains of New Hampshire: Bondcliff (elev. 4265′). There’s not doubt about it, backpacking while pregnant adds some extra challenges, but for me it has been totally worth it!

For my trip up Bondcliff, I decided to take a slow and steady approach, breaking what I might normally do in one or two challenging days into a much more manageable 3-day trip. This allowed me to take the extra time my much heavier than usual body needed to do the hike and to have fun with it. The rewards for my efforts were a few gorgeous days enjoying the wilderness and then the spectacular views from the summit of Bondcliff :)

Pregnant backpacker sitting at the edge of Bondcliff

Trip Report: Bondcliff Backpacking Out-and-Back

  • Date: August, 2021
  • Activity: 3-Day Solo Backpacking Trip
  • Difficulty Level: Strenuous
  • Trail Name(s): Bondcliff via the Pemigewasset Wilderness and Franconia Falls (~18.8 miles total)
    • Day 1: Lincoln Woods Trail (2.8 miles, relatively flat) to the Wilderness Trail (1.8 miles, relatively flat) to dispersed camping on the Bondcliff Trail.
    • Day 2: Bondcliff Trail to the Summit of Bondcliff (~4.4 miles, almost all of the elevation) then back down to dispersed camping along the Bondcliff Trail (~4.4 miles)
    • Day 3: Wilderness Trail (1.8 miles, relatively flat), then the out-and-back to Franconia Falls (0.8 miles roundtrip), and finally the Lincoln Woods trail back to the car (~2.8 miles, relatively flat).
  • Location: Pemigewasset Wilderness, White Mountains National Forest, New Hampshire
  • Access and Amenities: Parking available at Lincoln Woods trailhead with a $5/day parking fee. Flush toilets, running water, and ranger station available at trailhead.
Pregnant backpacker standing at the edge of Bondcliff
The exposed cliffs of Bondcliff Mountain, with me standing out near the edge.

Why Bondcliff Via the Pemi While Pregnant?

There are a lot of different reasons why I chose Bondcliff for my third trimester backpacking trip, and planned it as a three day hike. I discuss five of the reasons below.

Crossing over Franconia Brook as I headed into the Pemigewasset Wilderness

#1. The first, is that the 4.6 miles of trail into the Pemigewasset Wilderness to the base of Bondcliff trail is a very easy hike. I figured that if I hiked out to the base of Bondcliff trail and my body, for whatever reason, wasn’t feeling up to hiking the 4000 footer I could always turnaround and hike back out again and call it a successful backpacking trip even if I didn’t climb the mountain.

Easy, flat terrain along the Wilderness Trail in the Pemigewasset Wilderness

#2. There is an abundance of dispersed backcountry campsites along the Wilderness Trail and the lower part of the Bondcliff trail, so I was able to set up a base camp out of site of the trail and far away from everyone else. This allowed me to leave most of my backpacking gear at my campsite while I did the more challenging hike up the Bondcliff Trail carrying nothing more than I would usually carry for a day hike. Since pregnancy has made me much heavier, slower, and more easily out of breath, I appreciated climbing the extra elevation without the additional weight of my full backpacking gear. (For those interested in the details, I actually ended up choosing a backcountry site on the far side of Black Creek about a mile up the Bondcliff Trail.)

The rockier terrain of Bondcliff Trail, including a large number of stone steps

#3. Unlike most 4000 footers in the White Mountains, the trail up Bondcliff requires very little hand-over-foot scrambling, and it doesn’t include any boulder fields. It is mostly a slow, steep, and steady climb the whole way up. Though the stone stairs gain enough altitude to ensure a hearty workout, the trail isn’t nearly as rugged as a lot of the other trails and not quite as hard on the knees. Given the extra weight and joint issues associated with pregnancy this made it a relatively good option as 4000 footers go. Although some trail descriptions mention a section of Class IV terrain near the summit, there is really just one spot that requires you to climb up a steep section of rock which has large slope-y steps that have been blasted/carved into it. I found it to be easy to navigate even with my bulkier body (caveat, if you are hiking with a dog it could be tricky trying to carry the dog up the steps).

The trickiest section of the Bondcliff Trail, which is maybe a 10 – 12 foot section you literally have to climb

#4. Did I mention that the summit has some of the most spectacular views in the White Mountains? The cliffs themselves are very cool, and you get a 360 degree view of the surrounding mountains including the Franconia Range and the rest of the Bonds. For people who are feeling energetic, two additional 4000 footers can easily be included in the hike (both Bond and West Bond). However, I decided to take it easy and despite my early arrival a the summit decided to lounge at the summit for a couple of hours enjoying the view and a surprising amount of solitude for one of the White Mountains most spectacular summits. (Most of the time I was up there I was only sharing the summit with one other person; thank you to my fellow hikers that graciously agreed to snap the photos of me standing at the summit cliff).

Happily standing at the edge of the cliff enjoying the gravid-y of the situation before heading back down

#5. Although the Lincoln Woods Trail is one of the most popular hiking trails in the Whites, a midweek hike beyond it to the Wilderness Trail and Bondcliff Trail can allow you to escape the crowds and appreciate some of the quiet and solitude that the Wilderness has to offer. The place that I chose to camp allowed me to get far enough off of the beaten path, and to have enough staggered timing, so that I was able to stop on multiple occasions and appreciate the fact the the only sounds were the occasional chirping of the birds and the gentle breeze above my head. That kind of quiet is becoming more and more rare in the NorthEast.

A quiet patch of wilderness

Final Thoughts

As my pregnancy progresses, the nature of the hikes and trips I feel comfortable taking is evolving with my body. In general, I’ve found that I need to reduce my daily mileage, need to hydrate more, eat more frequently, provide more support for my joints, and take more frequent breaks while pregnant. I also spend more time considering bail out plans (just in case) and am starting to choose less remote hikes. Although I’m planning on beginning to taper down to less rigorous treks, I’m hoping that with the support of my friends, loved ones, and health care providers I’ll have the opportunity to get in some more hiking in before the baby comes :)

A happy pregnant backpacker with a full pacl.
A happy hiker heading out of the Pemi

P.S. I’ve made a number of modifications to my pack and gear to help accommodate my ever changing pregnant body, and the lack of maternity hiking clothes generally available on the market. I’m planning on saving that discussion for an upcoming post, but for now, one of the most useful modifications I’ve found is to use a padded seatbelt cover over the band of the hip belt and to tighten the hip belt down below the below (see photo above). That way the hip belt can be used as a “belly band” to help support and stabilize the belly at the same time as it allows part of the weight of the pack to be carried on your hips. For me, the added belly support from the padded hip belt makes hiking with the pack on more comfortable than hiking without it!

Hiking Mt. Washington: 6 Months Pregnant

Hiking Mt. Washington: 6 Months Pregnant

“How long will my pregnant body keep letting me climb mountains?” I wasn’t sure what the answer was going to be, so I decided I better plan any big climbs sooner rather than later. That put Mt. Washington, the tallest peak in New England, at the top of my list. Mt. Washington is infamous for having some of the worst weather in the world, and I’ve hiked it in really nasty weather, but for this hike I watched and waited for a GOOD weather window.

Eventually the general forecast and Mt. Washington Higher Summits Forecast agreed that the weather would be perfect hiking weather so I prepared to head up to the Whites for the night and then get an early start to my hike the next morning. There was just one problem :( Pregnancy, even in the second trimester, sometimes comes with a side of nausea and vomiting, and the day I was planning to drive North to the Whites was one of those days when food was not agreeing with me… So instead of heading to the mountains, I curled up with my favorite electrolyte solution, and postponed my hike.

Luckily by the next day I was feeling fine again, and miraculously the weather on Mt. Washington for the following day looked agreeable, so I only had to delay my trip by a day.

Trip Report: Solo Mt. Washington Loop @ 24 Weeks Pregnant

  • Date: July, 2021
  • Activity: Solo Day Hiking
  • Difficulty Level: Strenuous
  • Trail Name(s): Mt. Washington Loop Via the Ammonoosuk and Jewell Trails (~9.2 miles total, ~3,809′ elevation gain)
    • Ammonoosuk Ravine Trail to Lakes of the Clouds Hut (3.1 miles, difficult)
    • Crawford Path (AT) to the summit of Mt. Washington (1.5 miles, moderate)
    • Gulf Side Trail (AT) from the summit to the Jewell Trail (0.9 miles, easy)
    • Jewell Trail to the Ammonoosuk Ravine Trailhead (3.7 miles, difficult)
  • Location: , White Mountains National Forest, New Hampshire
  • Access and Amenities: Parking available for a $5/day fee at the hiker parking lot. Outhouse available at the parking area.
The Ammonoosuk Ravine Trail starts of rocky and rooty, and stays that way.

Ammonoosuk Ravine Trail

I got an early start and was on the trail by 5:30 am. Although I was confident that I could still climb Mt. Washington, I wanted to give myself plenty of time so I could take whatever leisurely pace my body needed… Also, the weather for the morning looked better than the weather for the afternoon.

Although the Ammonoosuk is either rocky, rooty, or both from start to finish, the first mile of trail from the parking area to the side trail to Marshfield Station (and the Cog) has very little elevation gain and is generally easy and went by quickly. From there, the trail follows the Ammonoosuk River another relatively easy mile (gaining about 500ft elevation) to Gem Pool and cascade. I knew from there the trail was going to get quite a bit steeper, so I stopped to take a break, eat a snack, and adjust my layers.

At the pool I ran into another solo female hiker that was going about the same speed as I was, who was also stopping for a snack.

“You know, the best cascade of the trail is just a little bit further up, on an unmarked side trail to the right. Have you ever checked that one out?” she asked. Although I’ve hiked the Ammonoosuk Ravine Trail at least a dozen times, I was usually hiking it in the winter and couldn’t recall having ever checked it out before.

“I’ll check it out,” I smiled as I headed up the trail and she stayed at the pool to finish her snack. Although it was less than 0.2 miles (my GPS said 0.16 miles and ~300 feet of elevation gain) from the pool to the unmarked trail, it was steep and my new friend caught up with me well before I got there.

“Would you like to pass?” I asked, “You’re definitely going faster than I am on this steeper stuff.”

“No, I should slow down,” she replied, “if you don’t mind the company, I’ll join you for a bit.”

I told her I didn’t mind the company, and before long we came to the cutoff for the waterfall. The trail to the waterfall was a couple of hundred feet long and downhill the whole way, but I was curious and my new friend highly recommended it. It turns out she was right, it was definitely worth the detour. The photos don’t do it justice. The cascades start a couple of hundred feet up and tumble down two paths into a pool where the trail comes out, and you can see that the cascade continues out of sight below you as well. It is easy to imagine it’s path cascading the rest of the way down to the Gem Pool.

We took a moment to take in the waterfalls and photograph each other before heading back to the main trail and the climb ahead of us.

There’s no doubt that as each week in my pregnancy passes I get slower and slower going uphill, but it was such a phenomenally gorgeous day that I didn’t want it to go by too quickly anyway. Besides, it was nice having the company of a new friend to talk with as I climbed.

As we emerged above tree line we were met with phenomenal views and the added bonus of an array of wild flowers in bloom.

It seemed strange to see flowers where I was used to seeing ice. However, the trail felt just as steep in the exposed sections in the summer as it does in the winter when it is covered in ice and requires crampons. Even though it is steep, I was reminded that one of the great things about the Ammonoosuk is the distinct lack of boulder fields you frequently encounter on other routes up Mt. Washington.

Once we got above treeline, the rest of the distance to the Lakes of the Clouds Hut went by quickly.

Crawford Path (The AT)

We stopped at the hut, ate snacks, rested, refilled out water bottles, and used the restrooms before setting off on Crawford Path (aka the AT) for the remaining 1.5 miles climb to the summit.

I was still in awe of our luck with the weather. When I had hiked this section of trail on my AT thru-hike in 2013 it was cold, windy, and foggy… I was lucky if I could see 10 feet in front of me. Today, however, the weather was perfect. Sunny and warm, but not to hot, and most amazingly of all there was almost zero wind! In short, it’s the kind of weather that is almost unheard of on Mt. Washington.

The view looking back at Lakes of the Cloud Hut and Mt. Monroe

The trail to the summit was rocky but relatively easy, but it was uphill and I was still moving fairly slowly. The weather was so nice, and we’d gotten an early enough start that we could linger above tree line appreciating the views and not have to worry much about the time.

The Summit

Surprisingly, we hadn’t run into much in the way of crowds on the trail even though it was a Saturday with gorgeous weather. That changed, however, when we reached the summit. Between visitors from the Cog Railway and the Auto Road, the summit itself was absolutely mobbed… Although I expected it to be crowded, it’s been a very long time since I’ve been on top of Mt. Washington on a beautiful sunny summer weekend and I had no idea that nowadays you have to stand in line if you want to take your photo at the sign on the summit.

I took one look at the summit line and decided I’d skip it. However, my new friend convinced me that the line would move quickly and since I’d hiked all the way up to the summit I might as well take the extra breather, wait in the line, and do the summit photo thing. It turns out she was right, it wasn’t too long a wait, and I was glad I did it.

Although my original plan had been to descend via the same route I’d come up, with the option of climbing Mt. Monroe on the way down, I’d been tempted to descend via the Gulf Side Trail (the AT) and then the Jewell Trail to check it out. My friend’s original plan was to descend via the Cog railway, but it was so nice out she decided she was going linger above tree line and hike down via the AT and Jewell Trail. Unsurprisingly, by the time we’d finished our snacks at the summit we’d decided to hike down together.

The Gulf Side Trail (The AT)

Leaving the summit along the Gulf Side Trail we immediately got rid of the crowds and found ourselves enjoying the views of the alpine meadows and spectacular views of the Northern Presidential Range. We couldn’t complain. In addition, my new hiking buddy was a birder, and she pointed out some rare alpine birds as we meandered down the trail towards the Jewell Trail.

The Jewell Trail

By the time we got to the trail junction for the Jewell Trail, the trail had become quite rocky and I remembered my parents advice:

“You don’t want to go that way! It’s a nasty boulder field. Been there, done that, would not do again.”

It turns out my parents were right, the top part of the Jewell Trail is definitely a slog through a boulder field. I was definitely glad that I’d put both of my ankle braces on for extra support, and that I had my trekking poles with me. Also, I was glad to be going DOWN the boulder field and not UP it. I think if I’d been going up it would have felt like the boulder field went on FOREVER.

Hiking through the boulder field on the Jewell Trail

As it was, it was slow going, but my joints felt fine and I was so glad to be above tree line and having a spectacular hike that I didn’t mind too much.

By the time the trail descended below tree line the boulder field subsided into the standard rocks and roots that you’d expect of a New England trail. So I would say that the trail from there was relatively good, but I was definitely getting tired.

The final mile of trail from the junction for the Marshfield Station to the Trailhead Parking lot was some of the most easy going trail you’ll find in the Whites. Despite that, my feet were decidedly sore… more sore than they’d been in a long time, and I was looking forward to getting off of my feet, eating a ginormous meal, taking a shower and heading to bed.

Although I was exhausted from the days hike, by the time I’d driven back to my refuge for the night I was already starting to plan my next hiking adventure… Surely if I could climb Mt. Washington while pregnant I could get in some more backpacking this summer too ;)

MakerMask: A New Adventure

I never thought my own struggles with occupational asthma or MacGyvering back-country masks for wildfire smoke on the PCT (2014) and CDT (2018) would come in handy in a global health crisis, but here we are…

I am putting to good use a decade of research and background into respiratory health, the science of particle sizes, models of particle dispersal patterns, depth of penetration into the lungs, and a very personal relationship with N95s to work with a team of volunteers on the MakerMask project.

Early in March (right after my last post), I started making and fit-testing prototypes for science-driven mask designs. On March 17th, I mailed four prototypes to @ATOR Labs in Florida for preliminary lab validation. Today, MakerMask has two patterns on our website – makermask.org — and a third design in the pipeline.

MakerMask Prototype Development

“MakerMask: Fit” and “MakerMask: Surge” prototype development using NWPP from a New England Patriots bag. After discovering most elastics for home sewers include latex and don’t withstand sterilization, more recent models use latex-free cloth ties.

Four key lessons:

  1. Nonwoven polypropylene (NWPP) provides better droplet protection than cotton, which is especially relevant in a droplet-transmitted pandemic. NWPP is the material of choice for commercial medical-grade masks. Water-resistant NWPP outer layers block the droplets that can carry viruses from coughs and sneezes, while allowing for vital airflow. Reusable grocery bags are an accessible source of NWPP.
  2. Certified N95 masks with valid fit tests are a critical resource for our front line communities, and the supply chain for those materials is stretched thin. Single layer NWPP covers can extend the lifetime of our limited stocks of commercial-grade masks.
  3. Latex-free designs are important, especially in clinical settings. Cloth ties or bias tape have advantages over elastic straps b/c they don’t contain latex allergens and can be sterilized without heat damage. Look for designs that can be home-sterilized by boiling before community use or be sterilized in autoclaves for larger scale use.
  4. This impacts all of our communities; we all can help; and I need your help. In addition to sewists, MakerMask is seeking volunteer team members to help with mask testing, communications, project management, and IT. I also need help from fellow researchers, clinicians, and friends who can use these masks and help get the word out about the importance of science-driven, clinically relevant designs. Check out https://makermask.org/contribute/ if you can offer help!

Thank you and stay safe!

"MakerMask: Surge"

The MakerMask:Surge, shown here in the snow last week was designed to provide droplet protection, to be latex-free, home sterilizable, and relatizely easy to construct.

Links with MakerMask in the News: